

We’ve all been there. You’re in the middle of a deep-work session, or maybe you’re just trying to track down a package, and you click a link. Instead of the page loading, Chrome takes a long, agonizing pause and drops a blank screen on you with those dreaded five words: “This site can’t be reached.”
Usually, it’s accompanied by some cryptic sub-text like ERR_CONNECTION_TIMED_OUT or DNS_PROBE_FINISHED_NXDOMAIN.
A few weeks ago, I was finishing up a massive web development project for a client. Right as I went to show them the staging site, boom—Chrome locked me out with this exact error. My stomach dropped. I tried refreshing. Nothing. I tried clearing my cache. Still nothing.
It turns out, this error is rarely a sign that the internet is down completely. More often than not, it’s just a breakdown in communication between Google Chrome, your computer’s network settings, and your router.
After spending years troubleshooting network hiccups and building sites, I’ve put together a foolproof mental checklist to fix this. Let’s walk through the exact steps I use to get things back up and running, moving from the quickest fixes to the slightly deeper tweaks.
The 10-Second Reality Check (Before You Change Any Settings)
Before we start tinkering under the hood of your operating system, we need to isolate the problem. The biggest mistake I see people make is changing ten different settings on their PC when the actual issue is just a temporary glitch with the website itself or their Wi-Fi router.
- Try another device: Pull out your phone, disconnect from Wi-Fi so you’re on cellular data, and try accessing the same URL. If it loads on your phone but not your computer, the issue is local to your machine. If it doesn’t load anywhere, the website’s server might actually be down.
- The Incognito trick: Press
Ctrl + Shift + N(orCmd + Shift + Non Mac) to open an Incognito window. Try the site there. If it works, a rogue Chrome extension or a corrupt cookie is messing with your connection. - Restart the router: I know it’s a cliché, but pulling the power cord out of your router, waiting 30 seconds, and plugging it back in fixes an astonishing number of IP routing issues.
If none of those quick checks solved it, the issue is likely embedded in your system’s network configuration or Chrome’s internal setup. Let’s roll up our sleeves and fix it.
1. Clear Chrome’s Hidden DNS Cache
Most people know how to clear their browser history, but Chrome actually maintains its own internal DNS (Domain Name System) cache that is completely separate from your operating system. If a website changes its server settings or IP address, Chrome might still be trying to use the old, outdated route, triggering the “Site can’t be reached” page.
Here is how to empty that specific cache:
- Open a new tab in Google Chrome.
- Copy and paste this exact address into your URL bar and hit Enter:
chrome://net-internals/#dns - You will see a plain, utilitarian page. Look for the button labeled Clear host cache and click it.
Nothing flash will happen on screen—no confirmation popup or success sound—but the internal registry is wiped. Now, try reloading the problematic website.
2. Flush Your System’s DNS and Renew Your IP
If Chrome’s internal cache wasn’t the culprit, your computer’s operating system might be holding onto bad routing data. Think of it like a GPS map that hasn’t been updated; your computer keeps trying to take a road that is closed.
To force your system to fetch a fresh map, we use a quick command-line sequence.
On Windows:
- Press the Windows Key, type
cmd, and right-click on Command Prompt. Select Run as administrator. - Type the following command and hit Enter:DOS
ipconfig /flushdns(You should see a message saying it successfully flushed the DNS Resolver Cache.) - Next, release your current IP address by typing:DOS
ipconfig /release - Finally, request a brand-new IP address from your router by typing:DOS
ipconfig /renew
On macOS:
- Open the Terminal app (press
Cmd + Space, type “Terminal”, and hit Enter). - Paste the following command and press Enter (you will need to type your Mac’s login password):
Bash
sudo dscacheutil -flushcache; sudo killall -HUP mDNSResponder
Once done, restart Chrome and check the site again. This sequence clears out the cobwebs in your local network stack and solves the issue about 70% of the time.
3. Switch to a Public DNS Provider
By default, your computer uses the DNS servers provided by your Internet Service Provider (ISP). To put it bluntly, ISP DNS servers can be slow, unstable, and prone to temporary outages. When they act up, Chrome won’t know how to translate a domain name (like example.com) into a machine-readable IP address, resulting in a connection error.
Switching to a rock-solid, free public DNS provider like Google or Cloudflare can dramatically improve your connection reliability and speed up your browsing.
How to change DNS on Windows:
- Open the Control Panel and navigate to Network and Sharing Center > Change adapter settings.
- Right-click on your active connection (Wi-Fi or Ethernet) and select Properties.
- Double-click on Internet Protocol Version 4 (TCP/IPv4).
- Select the radio button that says Use the following DNS server addresses.
- Input these incredibly reliable public addresses:
- Preferred DNS server:
8.8.8.8(Google) or1.1.1.1(Cloudflare) - Alternate DNS server:
8.8.4.4(Google) or1.0.0.1(Cloudflare)
- Preferred DNS server:
- Check the box for Validate settings upon exit and click OK.
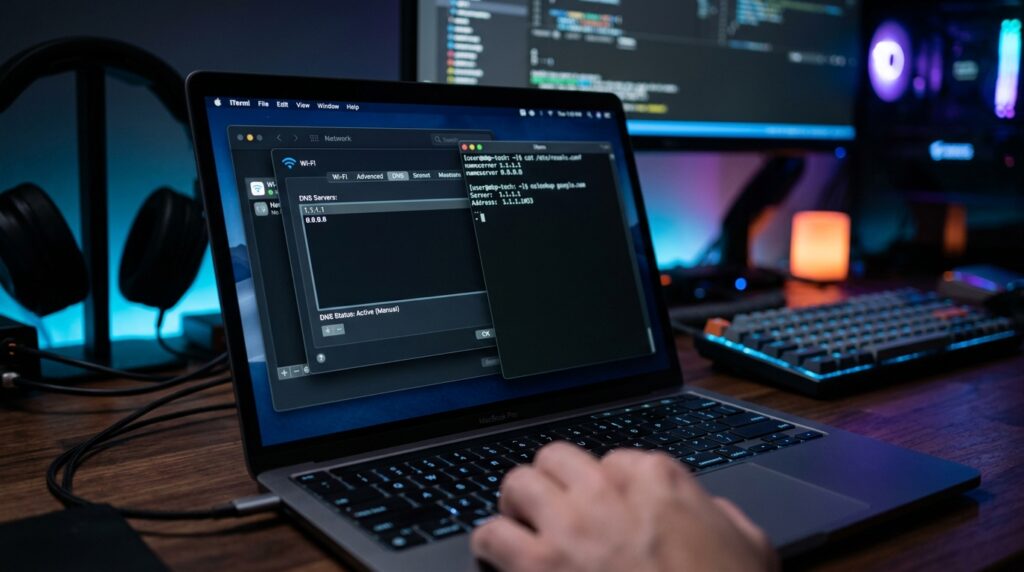
How to change DNS on macOS:
- Go to System Settings > Network.
- Click on your active network connection, then click the Details… button.
- Select the DNS tab from the left sidebar.
- Click the + (plus) icon under the DNS Servers list and add
1.1.1.1and8.8.8.8. - Click OK to apply.
4. Reset Chrome’s Flag Settings to Default
If you are a tech enthusiast, you might have ventured into Chrome’s experimental features area (chrome://flags) to enable beta tools or performance boosts. I love tweaking these flags, but I’ve learned the hard way that an update can suddenly cause an old flag to break network protocols entirely.
If you’ve ever tweaked things here, or if an extension altered something without your knowledge, it’s time to reset.
- In your Chrome address bar, type
chrome://flagsand hit Enter. - At the top right of the page, click the Reset all button.
- Chrome will prompt you to relaunch the browser. Click Relaunch.
This returns Chrome’s core engine back to its factory-tested state without deleting your bookmarks, passwords, or history.
5. Disable “Experimental QUIC Protocol”
Speaking of hidden settings, there is one specific built-in protocol that causes a surprising number of connection drops: QUIC (Quick UDP Internet Connections).
QUIC is an advanced protocol designed to make the web faster, but some network firewalls and local antivirus software misinterpret QUIC traffic as a security threat and block it entirely. Disabling it forces Chrome to fall back on traditional, highly compatible connection methods.
- Go back to
chrome://flagsin your address bar. - In the search box at the top, type QUIC.
- Locate Experimental QUIC protocol.
- Change the dropdown menu next to it from Default or Enabled to Disabled.
- Restart Chrome.
6. Check Your Local Proxy Settings
A lot of modern software, VPNs, and even background malware can stealthily alter your system’s proxy settings. A proxy acts as an intermediary for your web traffic. If your system is told to route traffic through a proxy server that is currently offline or misconfigured, Chrome won’t be able to fetch data from any external website.
Here is how to ensure your system isn’t trapped in a dead-end proxy loop:
On Windows:
- Press the Windows Key, type Proxy settings, and hit Enter.
- Scroll down to Manual proxy setup.
- Ensure that the toggle for Use a proxy server is turned Off.
- Make sure Automatically detect settings is toggled On at the top.
On macOS:
- Open System Settings > Network > select your network connection > Details….
- Switch to the Proxies tab.
- Ensure that all options (like Web Proxy and Secure Web Proxy) are toggled Off unless you explicitly set up a proxy for work or school.
Common Pitfalls to Avoid
When trying to fix network errors, it is incredibly easy to make things worse if you start clicking options blindly. Here are a few things you should avoid doing:
- Don’t disable your firewall permanently: While temporarily pausing your antivirus or firewall can help diagnose if security software is blocking a site, leaving it turned off leaves your machine vulnerable. If you find your antivirus was blocking the site, look into adding an exception for Chrome within that specific app rather than turning the whole shield off.
- Don’t use sketchy “Driver Updater” tools: Some forums suggest updating your network adapter drivers using third-party apps. These apps are often bloated with adware. If you genuinely need to update your network drivers, go directly to the official website of your computer manufacturer (like Dell, HP, or ASUS) or motherboard manufacturer.
- Avoid running random registry cleaners: On Windows, clearing registry entries rarely fixes a browser connection issue and carries a real risk of breaking system stability. Stick to the network reset options native to the OS.
Still Stuck? The Last-Resort Fix
If you have tried everything above and Chrome is still stubbornly refusing to load specific sites, it’s time for a clean slate. Over months and years of use, local user profiles in Chrome can experience subtle file corruption.
Go to Chrome’s settings, navigate to Reset settings on the left menu, and select Restore settings to their original defaults. This won’t wipe your saved passwords or bookmarks, but it will disable all extensions and clear temporary site data, effectively sweeping out any remaining digital debris.
The web can be finicky, and network configurations have a lot of moving parts. But by methodically ruling out the site itself, resetting your local DNS records, and ensuring Chrome isn’t choking on its own experimental settings, you can almost always banish the “Site can’t be reached” error and get back to your day.